
Flower Mound Wood Flooring has been doing hardwood floor refinishing for more than 20 years, working out of Flower Mound, TX and serving surrounding cities including Lantana, Highland Village, Trophy Club, Southlake and Roanoke. Refinishing is the largest part of what we do, and the reason is simple arithmetic: most of the housing here is old enough that the original floors have reached the end of their finish rather than the end of their life.
The single most useful thing a flooring contractor can tell you is how deep your floor actually needs to go, and it is the question most quotes skip. A dull, scratched floor with an intact finish is a different job from a floor worn through into bare wood in the traffic lanes, and the two are separated by a large amount of money. We measure the remaining wood before we quote, and if a screen and recoat will carry your floor for several more years, that is what we put in the proposal.
Everything else follows from that first measurement: which finish makes sense, whether a color change is possible, how long you are out of the room, and what the job costs. You get all of it in a written scope before anyone brings a sander into the house, so there is no revised number halfway through the week.
How Deep the Refinish Needs to Go
Screen and Recoat
A screen and recoat abrades the existing finish with a buffer and abrasive screen, then lays one or two fresh coats over the roughened surface. The wood is never touched, so the floor loses no thickness and the job is quick and comparatively inexpensive. It only works while the finish is still continuous: once traffic has worn through to bare wood, a recoat will not bond evenly and the worn areas stay visible under the new coats.
Full Sand and Refinish
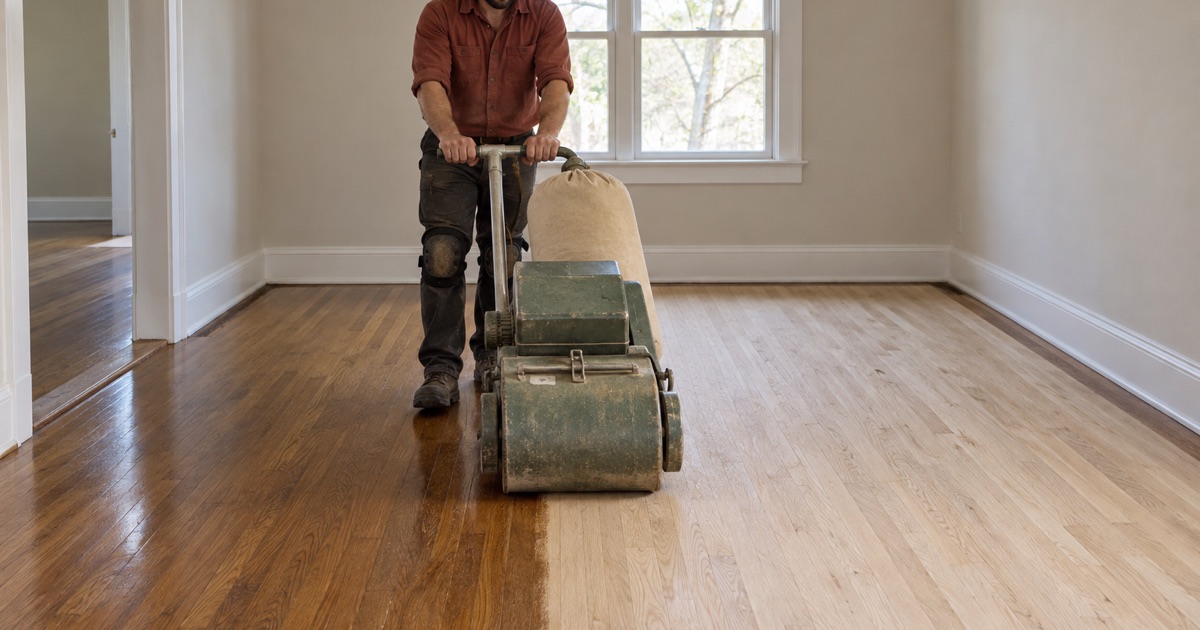
A full sand removes the old finish and a thin layer of wood with a grit sequence, using a drum sander in the field, an edger around the perimeter and cabinet toe kicks, and a buffer to blend the two before finishing. This is what takes out deep scratches, embedded staining, an old color you are tired of and a floor that has been recoated too many times. It is also the only route that lets you change the stain color.
When Neither Is the Right Answer
Some floors need repairs before any abrasive touches them, and a few are genuinely finished. Boards cupped past flat, water-damaged sections that have gone soft, or an engineered floor whose wear layer is already gone all need board replacement or replacement of the field before refinishing is a sensible conversation. We say so at the walkthrough rather than sanding first and discovering it in the middle of the job.
Choosing the Finish
Waterborne Polyurethane
Waterborne polyurethane cures fast, stays water clear over time and puts far less odor into the house than a solvent-based product, so the room comes back into service sooner and the household is less disrupted. It is the usual choice when the schedule is tight, when someone in the house is sensitive to fumes, or when you want a light or gray-toned floor to stay the color you chose rather than yellowing.
Oil-Modified Polyurethane
Oil-modified polyurethane builds a warm amber tone that deepens over the years, which is exactly what some homeowners want on red oak and exactly what others are trying to get away from. It takes longer between coats and puts more odor into the house while it cures. Where the goal is to match an existing older floor in an adjoining room, its ambering is often the reason it wins.
Hardwax Oil and Penetrating Finishes
Hardwax oil soaks into the wood rather than forming a film on top of it, which gives a very natural, low-sheen surface and makes spot repairs far easier: a scuffed area can be cleaned and re-oiled without refinishing the whole room. The tradeoff is a maintenance schedule, since the floor wants periodic re-oiling instead of being left alone for a decade.
Color, Species and What Sanding Reveals
Red Oak, White Oak and Hickory Under the Sander
Species decides more about the finished look than any product on the shelf. Red oak, the most common floor in existing homes here, carries pink undertones and a strong open grain, while white oak reads cool and neutral and takes light and gray tones cleanly. Hickory is harder still, with dramatic color swings from board to board. Janka hardness rating ranks their durability, but appearance is usually the deciding factor.
Changing the Stain Color
A color change means a full sand, and it means committing to what the species will actually do. We apply sample stains directly on your sanded floor, in the room’s own daylight and lamp light, and let you look at them at different times of day before anything is committed. A color chosen from a chip under showroom lighting frequently disappoints once it is on 900 square feet.
Sheen Level and How It Reads
Sheen level is how much light the cured finish returns, and it changes the apparent depth of an identical stain. Matte hides dust, footprints and hairline scratches best and is where most current work sits, satin adds a little warmth and reflection, and semi-gloss is bright, formal and unforgiving of everything. We hold one sheen across the floor, the stairs and any repaired area so the whole run reads as a single surface.
Living in the House While the Floor Is Refinished
Dust Containment and a Sealed Work Area
Our sanding equipment runs on a dust containment system, and before the first pass the work area is closed off from the rest of the house with zippered barriers and the room’s supply and return vents are covered. That last detail matters more than most homeowners expect: an uncovered return will happily distribute fine wood dust into every other room in the house through the ductwork.
Furniture, Pets and Room Sequencing
We move the furniture out and put it back, and where a house cannot be emptied at once we sequence the work room by room so you always have somewhere to live. Pets need a plan of their own, since a curious dog on a wet finish costs an entire coat. We agree the sequence in the written scope so nobody is improvising on the morning of day one.
Cure Time Before Rugs and Furniture Return
A finish is dry to the touch long before it is cured, and the gap between the two is where floors get damaged. Light foot traffic comes first, then furniture on felt pads, and area rugs last, because a rug laid over a finish that is still off-gassing can leave a permanent outline. We give you the actual schedule for the product used on your floor.
Our Step-by-Step Hardwood Floor Refinishing Process
Step 1: Walkthrough and Wear Layer Measurement
We walk the floor with you, note the failures worth fixing, take a pinless moisture meter reading and measure the remaining wood at a vent or threshold. That is where the screen-and-recoat versus full-sand decision is made, and it is made on a measurement rather than on a guess about the age of the house.
Step 2: Containment, Prep and Repairs
Furniture comes out, barriers go up, vents get covered and any board replacement or weave-in repair happens before sanding, so that patched areas are abraded and finished with the rest of the field. Loose boards are re-fastened and squeaks addressed at this stage, since both are far harder to reach once the finish is down.
Step 3: The Grit Sequence
Sanding runs from a coarse grit that removes the old finish through progressively finer passes that erase the scratch pattern left by the one before it. The drum sander handles the field, the edger works the perimeter and the buffer blends the boundary between them. Skipping a grit is the classic shortcut and it shows up as visible swirl marks under the finish.
Step 4: Stain Samples and Color Approval
If the floor is changing color, samples go down on the sanded wood and you approve your choice under the room’s own light before the whole floor is stained. If the floor is staying natural, this step is a water-pop and grain check instead. Either way nothing proceeds until you have seen the color on your own boards.
Step 5: Finish Coats and Cure
Coats go on with the dry time each product requires between them, with a light abrasion between coats where the finish calls for it. We check the room’s conditions as we go, since temperature and humidity change how a finish flows and cures. Then we hand back the room clean, with the cure schedule in writing.
- 20+ Years on Wood Floors
- Dustless Sanding and Containment
- Written Scope Before Work Starts