
Flower Mound Wood Flooring handles hardwood floor repair throughout Flower Mound, TX and serving surrounding cities including Lantana, Highland Village, Trophy Club, Southlake and Roanoke, with more than 20 years of experience behind the work. Repair is where the trade gets interesting, because almost every damaged floor is telling you about something else that happened to the house.
A scratched board is just a scratched board. A row of cupped boards along one wall, a hollow patch in the middle of a glue-down field, a gap that never closes, or squeaks that appeared in one hallway and nowhere else are all symptoms with a cause underneath them. Cutting out the visible damage and dropping in new wood without finding that cause produces a repair that fails again, usually in the same spot and usually within a year.
So our repair work starts with a diagnosis and a moisture reading rather than a saw. We identify what moved, what got wet, or what came unbonded, tell you plainly whether it is ours to fix or belongs to a plumber, an engineer or a pest professional, and then scope the flooring work against that answer in writing.
Repairs by Failure Type
Board Replacement
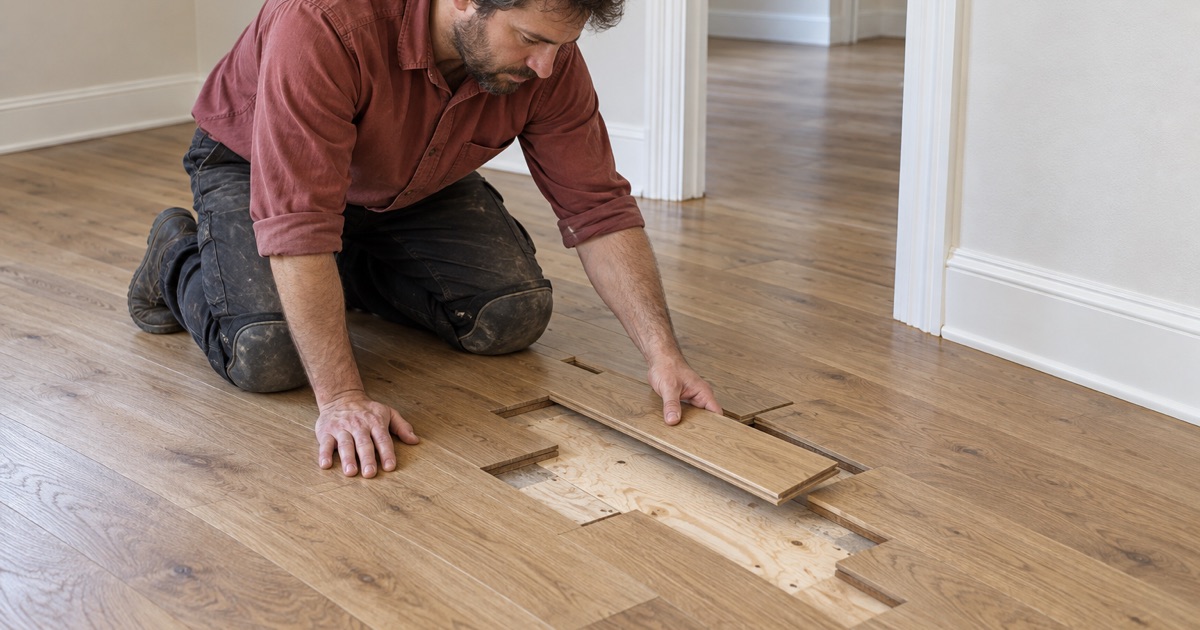
Damaged boards are cut and lifted individually, the subfloor beneath is inspected and cleaned, and new boards are set in with joints staggered against the surrounding field rather than lined up in a rectangle. This is the answer for water-blackened boards, boards split along the tongue, deep gouges that sanding cannot reach, and any board that has cupped or crowned past the point where it will flatten.
Weave-In Repairs and Dutchman Patches
A weave-in repair extends the replacement area outward in an irregular, interlocking pattern so the eye finds no straight boundary where old meets new. A dutchman patch does the same at a smaller scale, letting a shaped piece into a single board. Both are hand work, and both exist for one reason: a repair the customer can point to from the doorway is not finished.
Loose Boards, Squeaks and Hollow Spots
A hollow sound underfoot on a glue-down floor means the adhesive bond has released, and it usually covers a wider area than it sounds like. On a nail-down floor a squeak is movement between board, fastener and subfloor. We map the boundary of the affected area first, then re-bond, re-fasten or lift and reset depending on which layer actually failed.
Diagnosing Before Repairing
Cupping and Crowning
A cupped board is high at the edges and low in the middle, which means its underside holds more moisture than its face, and the source is almost always below the floor. A crowned board is high in the middle, and it is very often a cupped floor that somebody sanded flat before it had dried. Reading the profile correctly tells you where to look before a single board is cut.
Buckling and Tenting
Buckling lifts a section of floor clear of the substrate. Tenting raises two boards into a peak along one seam. Both mean the field has expanded harder than it can spread, which happens when moisture arrives or when the expansion gap at the perimeter was never left, was filled with construction debris, or was pinched by later trim or cabinetry. We find which before rebuilding anything.
Seasonal Gaps Versus Permanent Ones
Hairline gaps that open through a dry heated winter and close again in summer are wood doing what wood does. Gaps that persist across a full year, widen unevenly, or appear along one wall only are a different problem, pointing at fastening, a moisture gradient, or boards installed at the wrong moisture content. We record readings across visits where the timeline allows it.
Matching a Repair Into an Existing Floor
Species, Width and Grain
A match starts with the physical dimensions, since a board of the wrong thickness will never sit flush and a board of the wrong width breaks the pattern of the field. Then comes species and cut: red oak, white oak and hickory all take stain differently, and quartersawn grain reads nothing like plainsawn even in the same species and the same color.
Finish and Sheen
An existing floor has ambered, worn and dulled in traffic lanes, and matching it means matching what it is now rather than what it left the factory as. We test finish samples on the replacement boards, adjust the sheen level to the surrounding floor and check the result in the room’s own light, since a satin patch in a matte field is as obvious as a color mismatch.
When the Room Has to Be Refinished
Sometimes the honest answer is that a patch cannot be blended invisibly without refinishing the field around it. That happens with a large repair, a floor with heavy traffic-lane wear, or a color that has moved a long way from where it started. We say so before starting, price it as one job, and let you decide rather than presenting it as a surprise at the end.
Repairs With a Larger Cause Behind Them
Water From Slab Leaks and Appliances
A pinhole in a supply line under the slab, a failed icemaker line or a dishwasher pan can wet a floor for days before it shows. The flooring repair waits for the plumbing repair and the drying, and we document the whole sequence with dated photographs, recorded moisture readings and an itemized scope, which is the record an insurance claim actually needs.
Termite and Wood-Rot Damage
The code table this town has adopted rates termite infestation probability here as Very heavy, so what sits under an opened floor is worth genuinely inspecting rather than glancing at. When we pull damaged boards we look at the subfloor and framing beneath for galleries and rot, replace anything that has lost structural integrity, and refer active infestation to a licensed pest professional.
Movement After Foundation Repair
Foundation work lifts and re-seats a slab, and the floor above it goes along for the ride, which puts new stress on fasteners, adhesive bonds and expansion gaps that were fine last year. We sequence flooring repair after the foundation contractor has finished and the slab has settled, then re-check flatness before rebuilding rather than repairing onto ground that is still finding its level.
Our Step-by-Step Hardwood Floor Repair Process
Step 1: Diagnosis and Moisture Readings
We walk the damage with you, take pinless moisture meter readings inside and outside the affected area, check the perimeter expansion gap, and sound the field for hollow spots. The output is a cause, not just a list of bad boards, and it determines whether flooring work should start now or wait on another trade.
Step 2: Written Scope and Match Sourcing
You get a written scope naming which boards come out, which rooms are in the refinishing footprint and what the price is, before anything is cut. In parallel we source matching stock and, where a run is discontinued, plan which hidden areas can donate boards to the visible ones.
Step 3: Removal, Subfloor Check and Replacement
Boards come out cleanly, the substrate underneath is inspected and prepared, and replacements go in laced against the existing field. Loose boards nearby get re-fastened while the area is open, since reaching them later means going back through a finished surface.
Step 4: Blending, Finishing and Cleanup
The repaired area is sanded into the surrounding floor through a proper grit sequence, stained to match where staining is involved, and coated to the same sheen level as the rest of the room. Containment stays up until the finish work is done, and the room is handed back clean with the cure schedule in writing.
- 20+ Years on Wood Floors
- Dustless Sanding and Containment
- Written Scope Before Work Starts